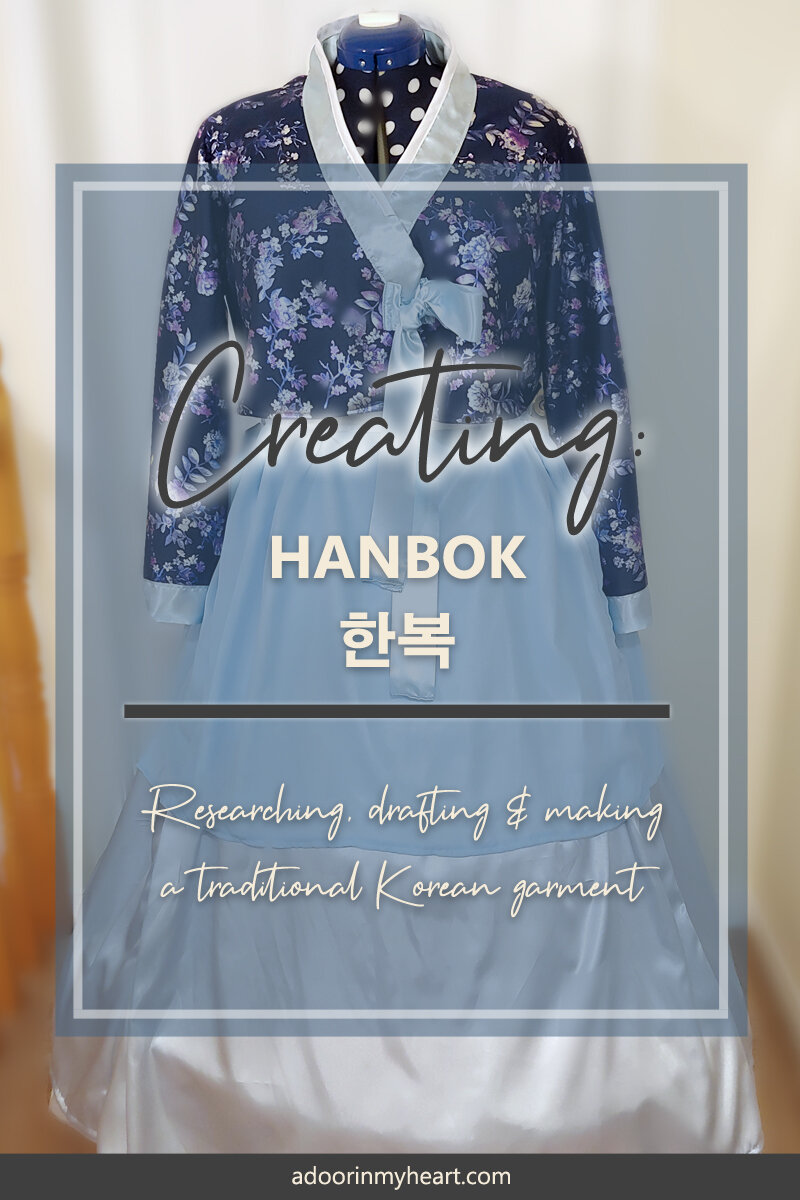
CREATING: How I Researched, Drafted & Made A Hanbok
From the very first moment I laid eyes on a hanbok (한복), I knew I had to own one. My dream is to one day own a really nice authentic hanbok purchased in Korea, but until that day comes, I decided to take the journey of making one myself. Join me, won’t you?
THE RESEARCH
As a total newbie to historical costuming, I started things off with a few quick Google searches, since I wasn’t sure where to go for the best resources (I assume many excellent resources are written in Korean, but unfortunately, my own Korean isn’t that good yet).
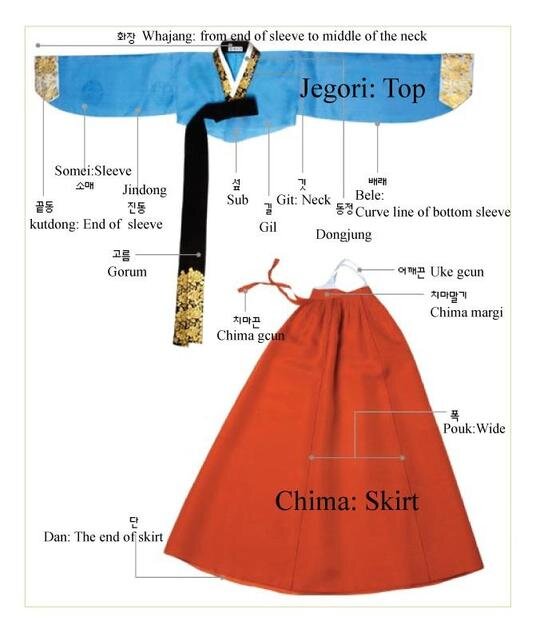
Image credit to koreners.com
I did luckily manage to find some very helpful blog posts and websites, from which I learned the correct names for all the pieces of the hanbok, the traditional colors used, the different styles based on status and age, the types of decoration, and many more fascinating historical facts. Admittedly, I’m a huge nerd who loves to fully understand the history and significance of objects from other cultures, so I probably spent way longer reading than was really necessary… no regrets though.
Anyway, I won’t bore you with everything I read (you can click here to read what I found to be the most informative full explanation) but I will break down a few quick facts to help you gain as much appreciation and respect for this amazing garment as I have.
Traditional 한복 Composition
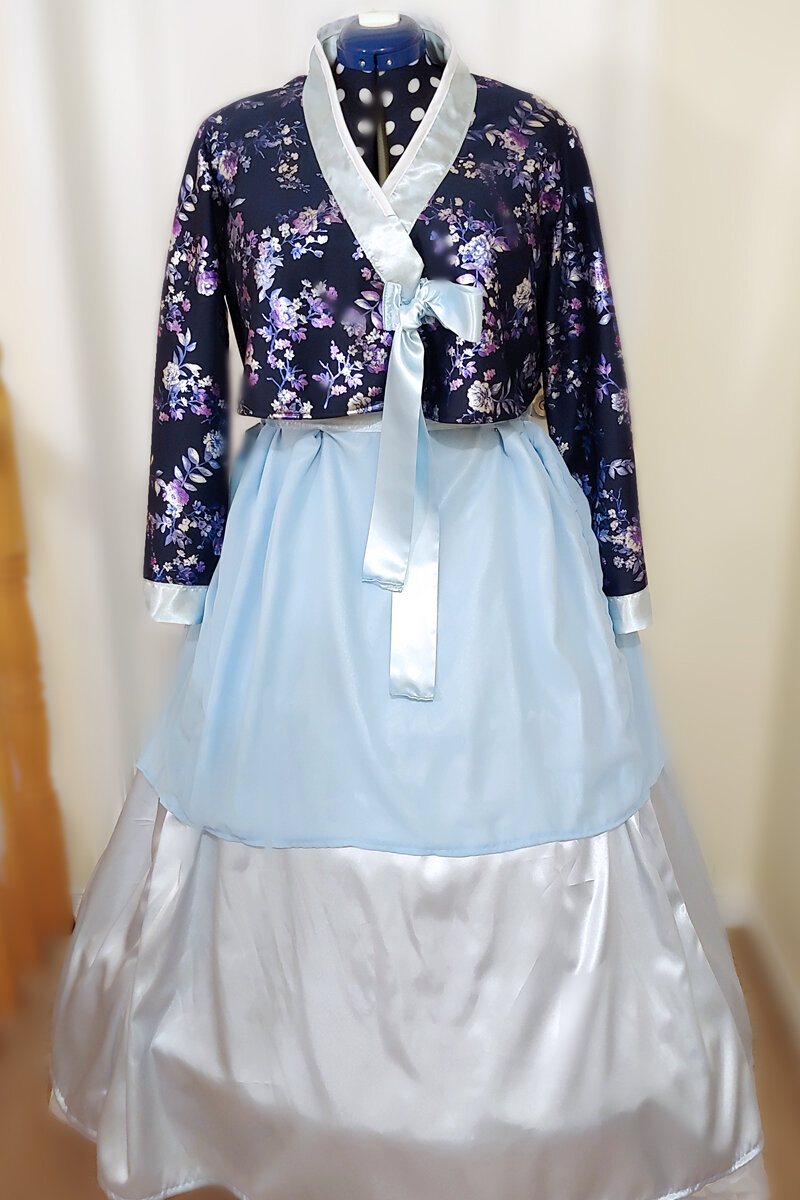
Women’s hanbok primarily consist of two pieces: the jeogori (저고리)— a jacket-like top —and the chima (치마). There’s also the collar trim, git (깃), and its friend dongjeong (동정), which is the white piece of trim on top of the git. The last key pieces are the cuffs or ggeutdong (끝동) and the tie that closes the jeogori, the goreum (고름).
There are more components when it comes to accessories, like shoes and headwear; unfortunately, I ran out of time before the Lunar New Year before I could make them. It’s likely I’ll take a shot at constructing all the accessories soon, so keep an eye out for a follow-up post!
Now, back to the subject at hand. In the past, a specific set of colors were used for hanbok, and played a significant role in their creation, as the color of fabric denoted important things like social status.
Luckily for me, color schemes aren’t so restrictive these days; pretty much any bright or rich color is welcome (although I will say, if you’re making a historically accurate hanbok, then you may want to read up on which colors go with the status you wish to display). Traditionally, each fabric chosen would be one solid color and decorated with embroidery.
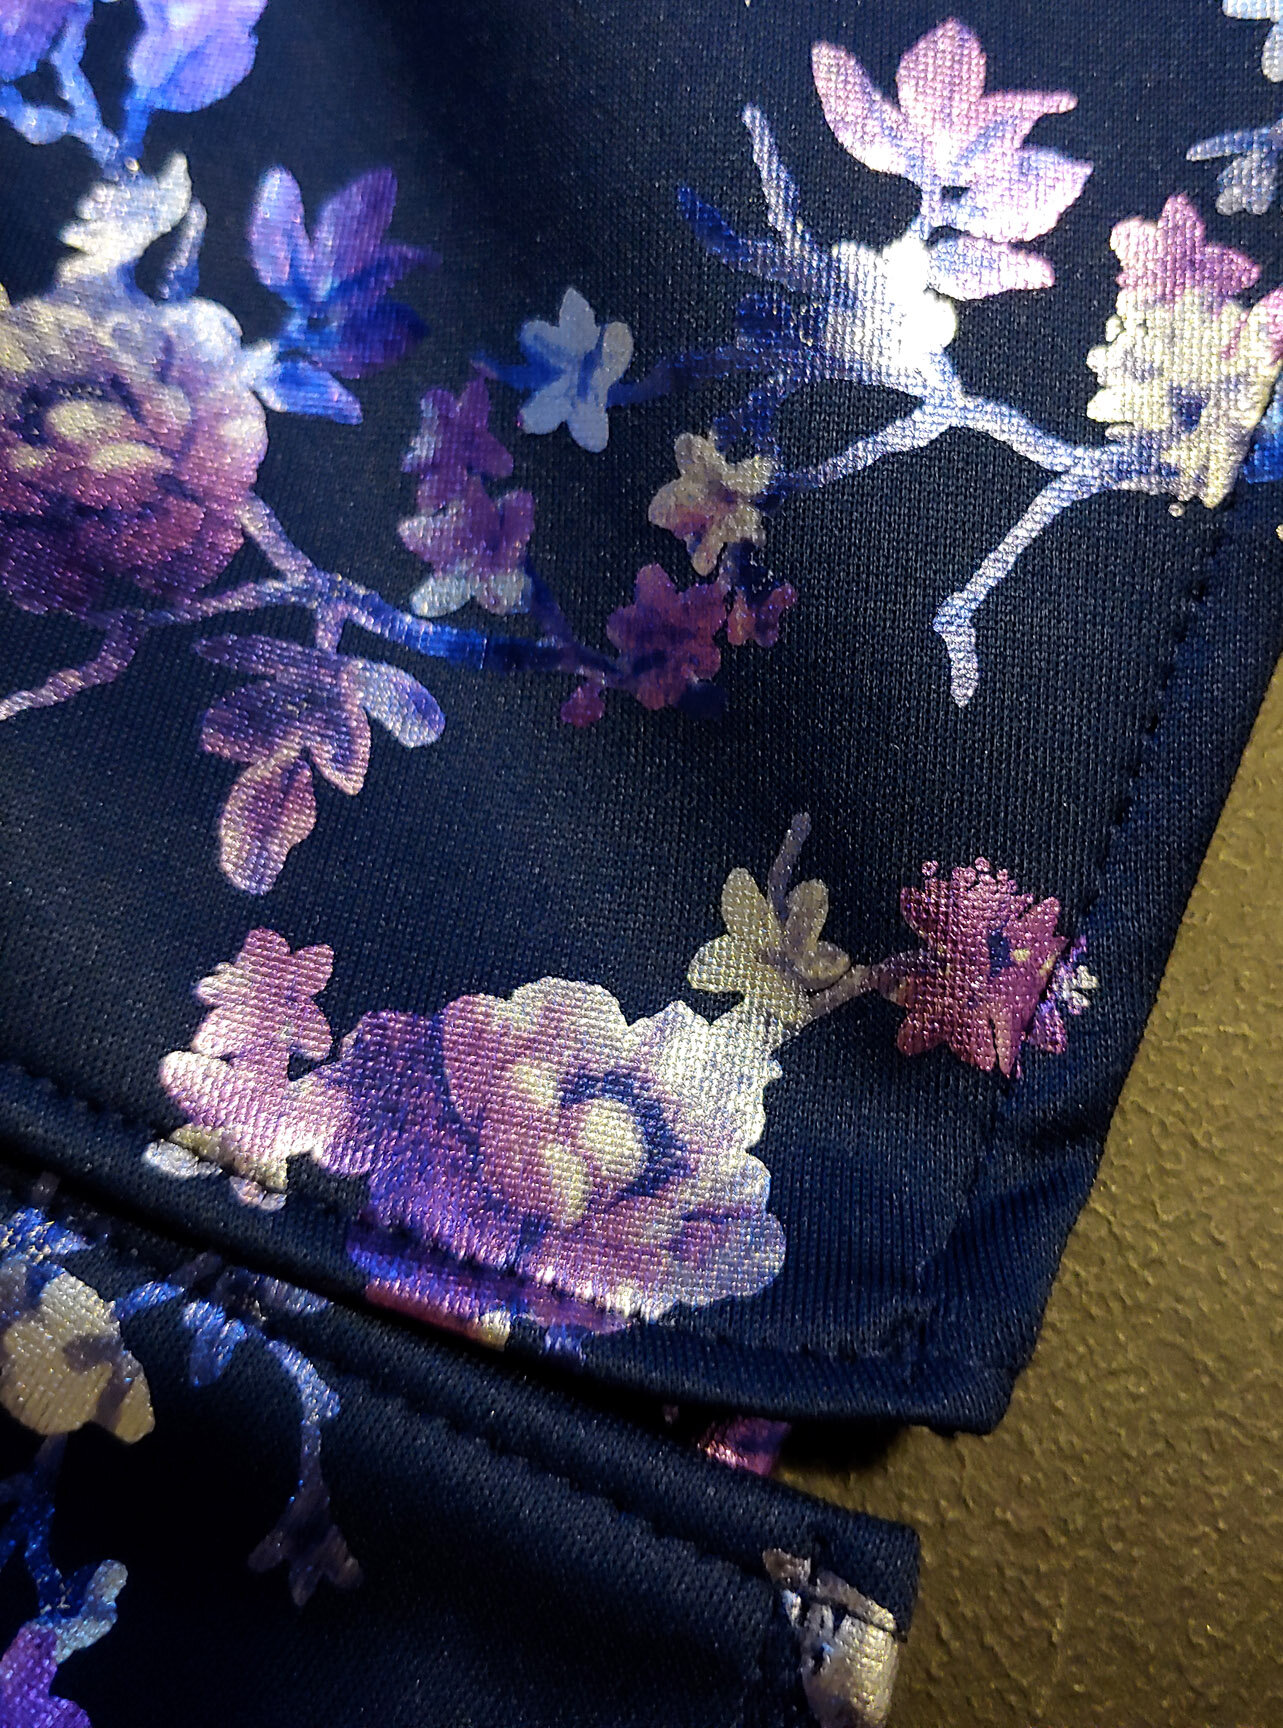
In this respect, the fabric I chose for my jeogori definitely strayed from what would be considered normal… the truth is, I saw this shimmery floral fabric, and it was so beautiful, and on sale, and I just… had to use it. Besides I’m no good at embroidery. Yet.
The style for a man’s hanbok is a little different. That’ll probably be my next historical costume project though, so I won’t go into it here.
THE DRAFT
I’ll be the first to admit I’ve used the word “drafting” a little loosely.
Since I’m not quite advanced enough to create a sewing pattern from scratch, I’ve taken to modifying and, to use a term I love, “Frankensteining” existing patterns. For the hanbok I started with two patterns: McCall’s M7081 for the base of the jeogori, and Simplicity 1095 for the base of the chima.
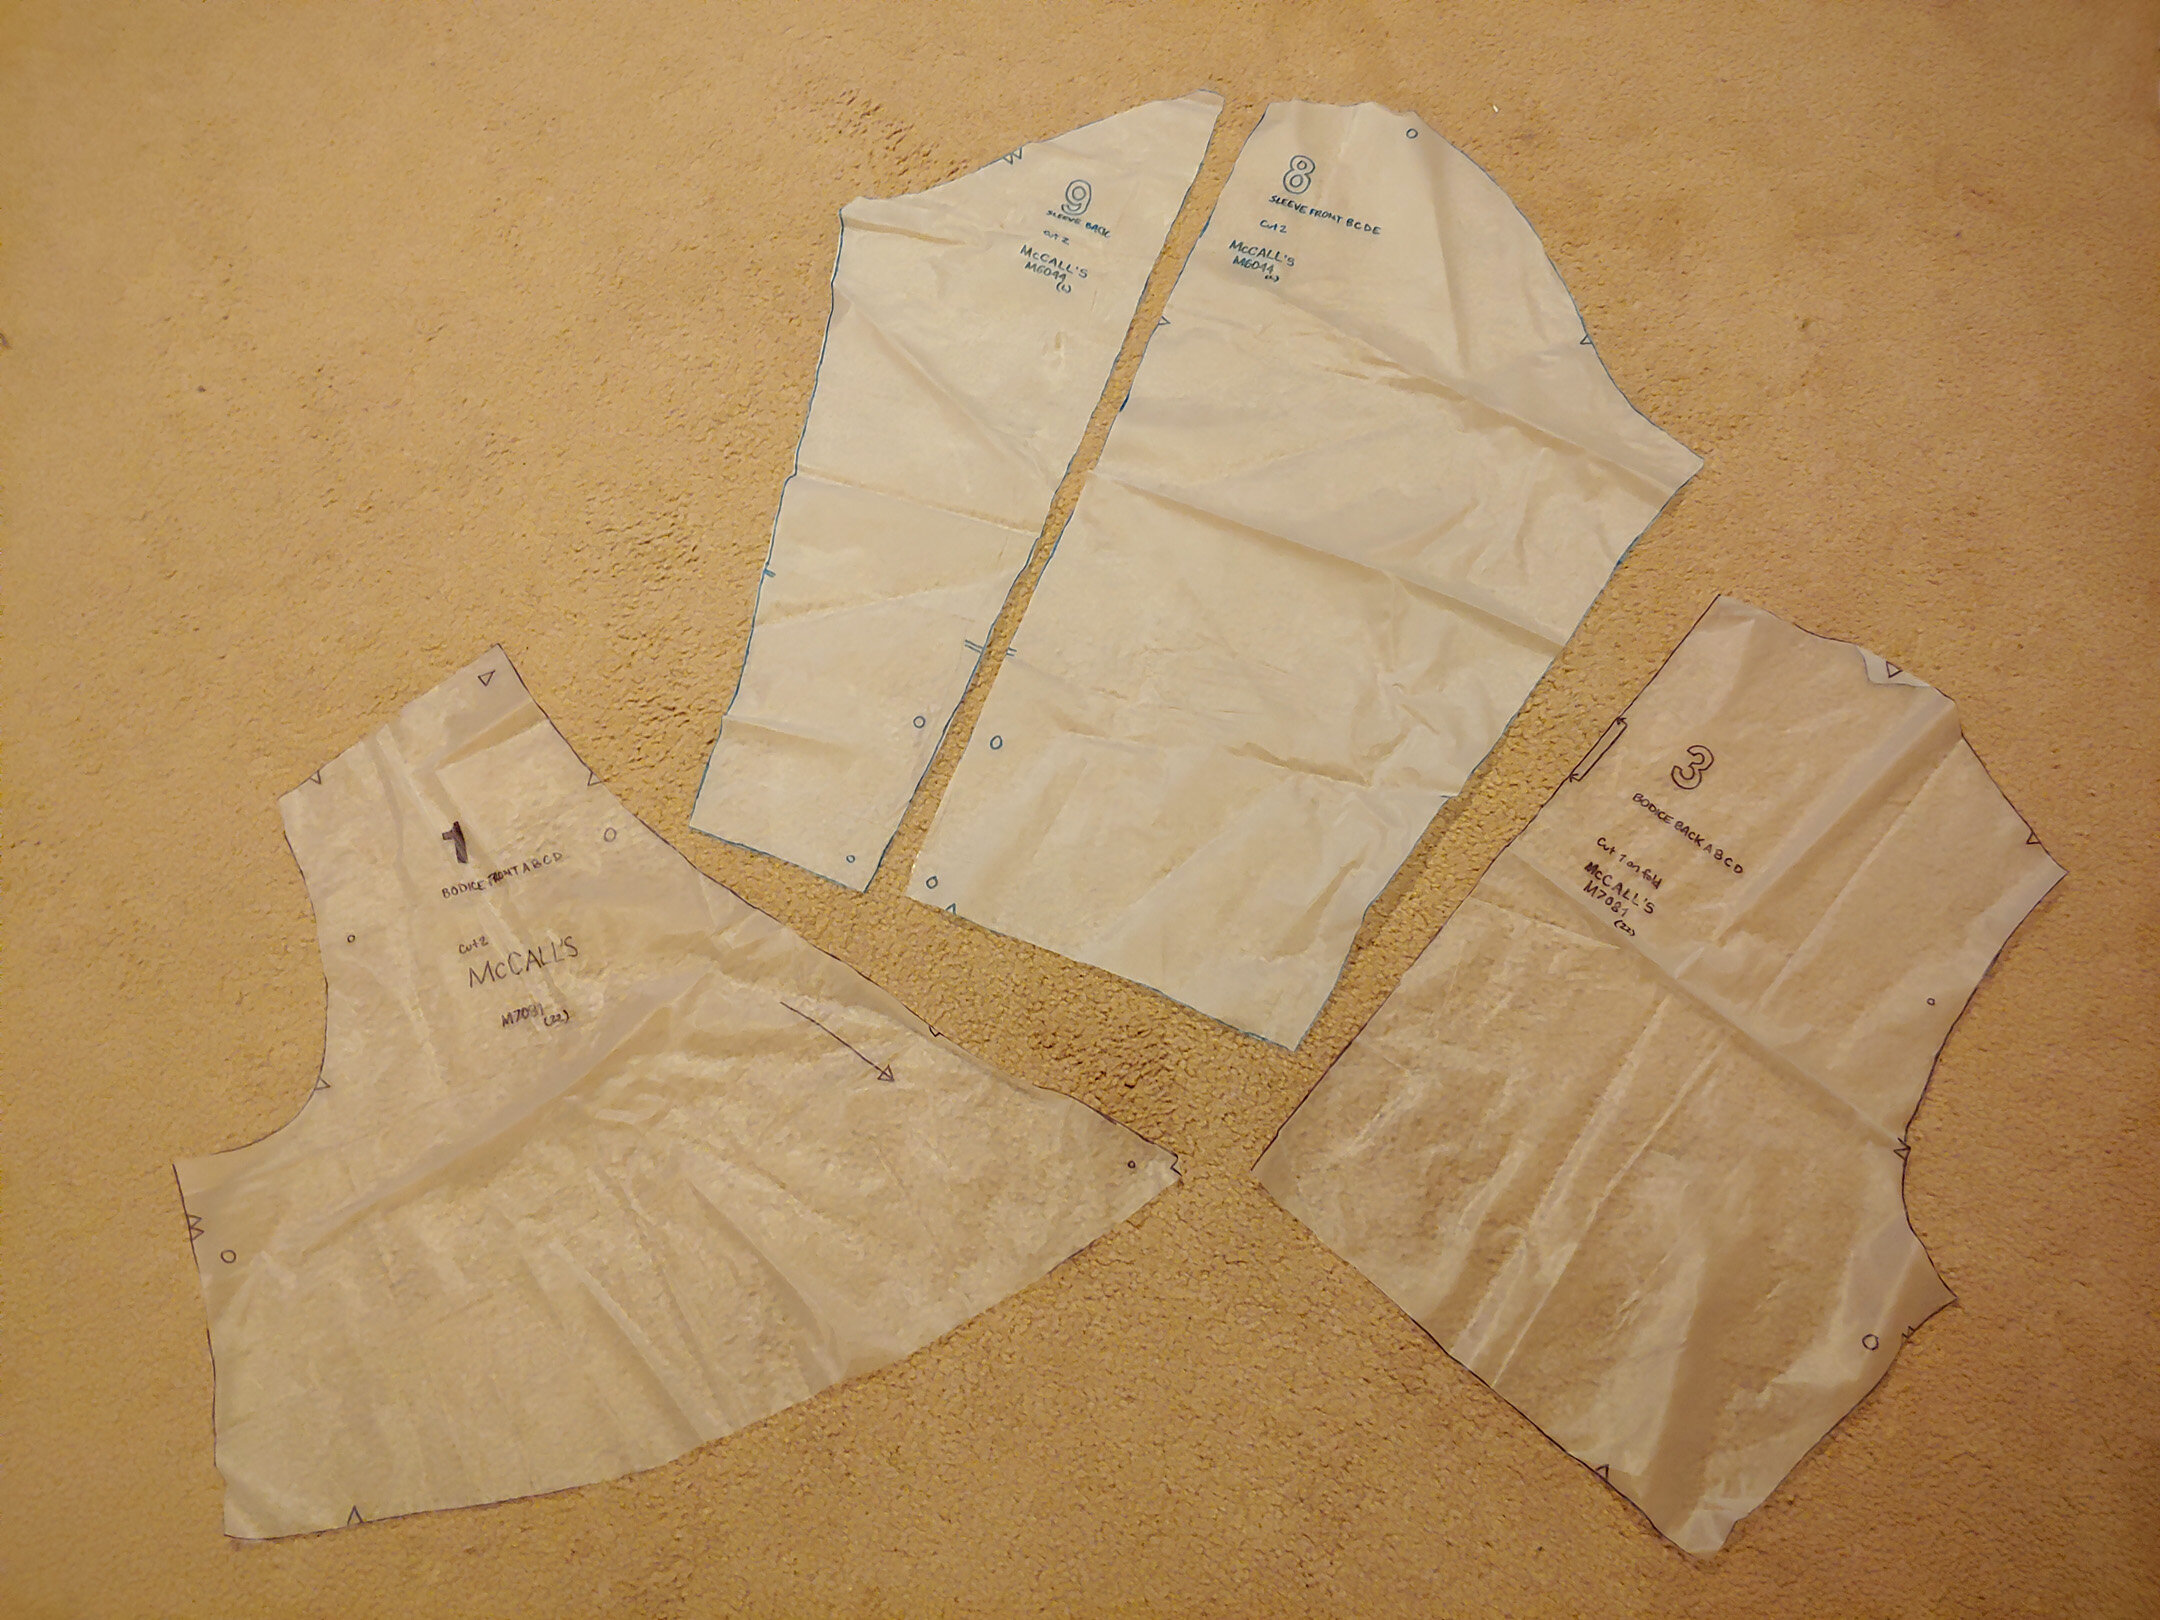
Many moons ago, I picked up a handy trick from a fellow cosplayer: instead of cutting out sewing patterns from the tissue paper that it’s originally printed on, trace the pattern onto a clear shower curtain liner (I buy mine at the dollar store). This way you don’t destroy the pattern if you want different sizes, you can lend the pattern to other people, and— crucially —it’s very easy to make modifications because you can draw them right onto the plastic.
The chima was straightforward enough, since it’s more or less a gathered skirt that’s tied at the uppermost part of the waist. I only needed to modify the closure from Simplicity 1095, changing it from a zipper to a tie, while everything else stayed the same. For the second tier I simply halved the length of the pattern for the full skirt.
The jeogori is actually made up of two patterns. I mentioned McCall’s M7081, from which the front and back pieces are taken, and the sleeves are taken from McCall’s M6044. I used a man’s sleeve to ensure the extra width and length of the final product on me.
Finally, whenever I modify a pattern, I always make a mock-up (or muslin) with scrap fabric before cutting into the good fabric. This way you don’t risk wasting expensive fabric, or ruining fabric you may not be able to replace. Personally, I always try to use the most hideous material possible for the mock-up because it ends up looking hilariously bad, and why not have a little silly fun while you’re sewing?
THE SEWING
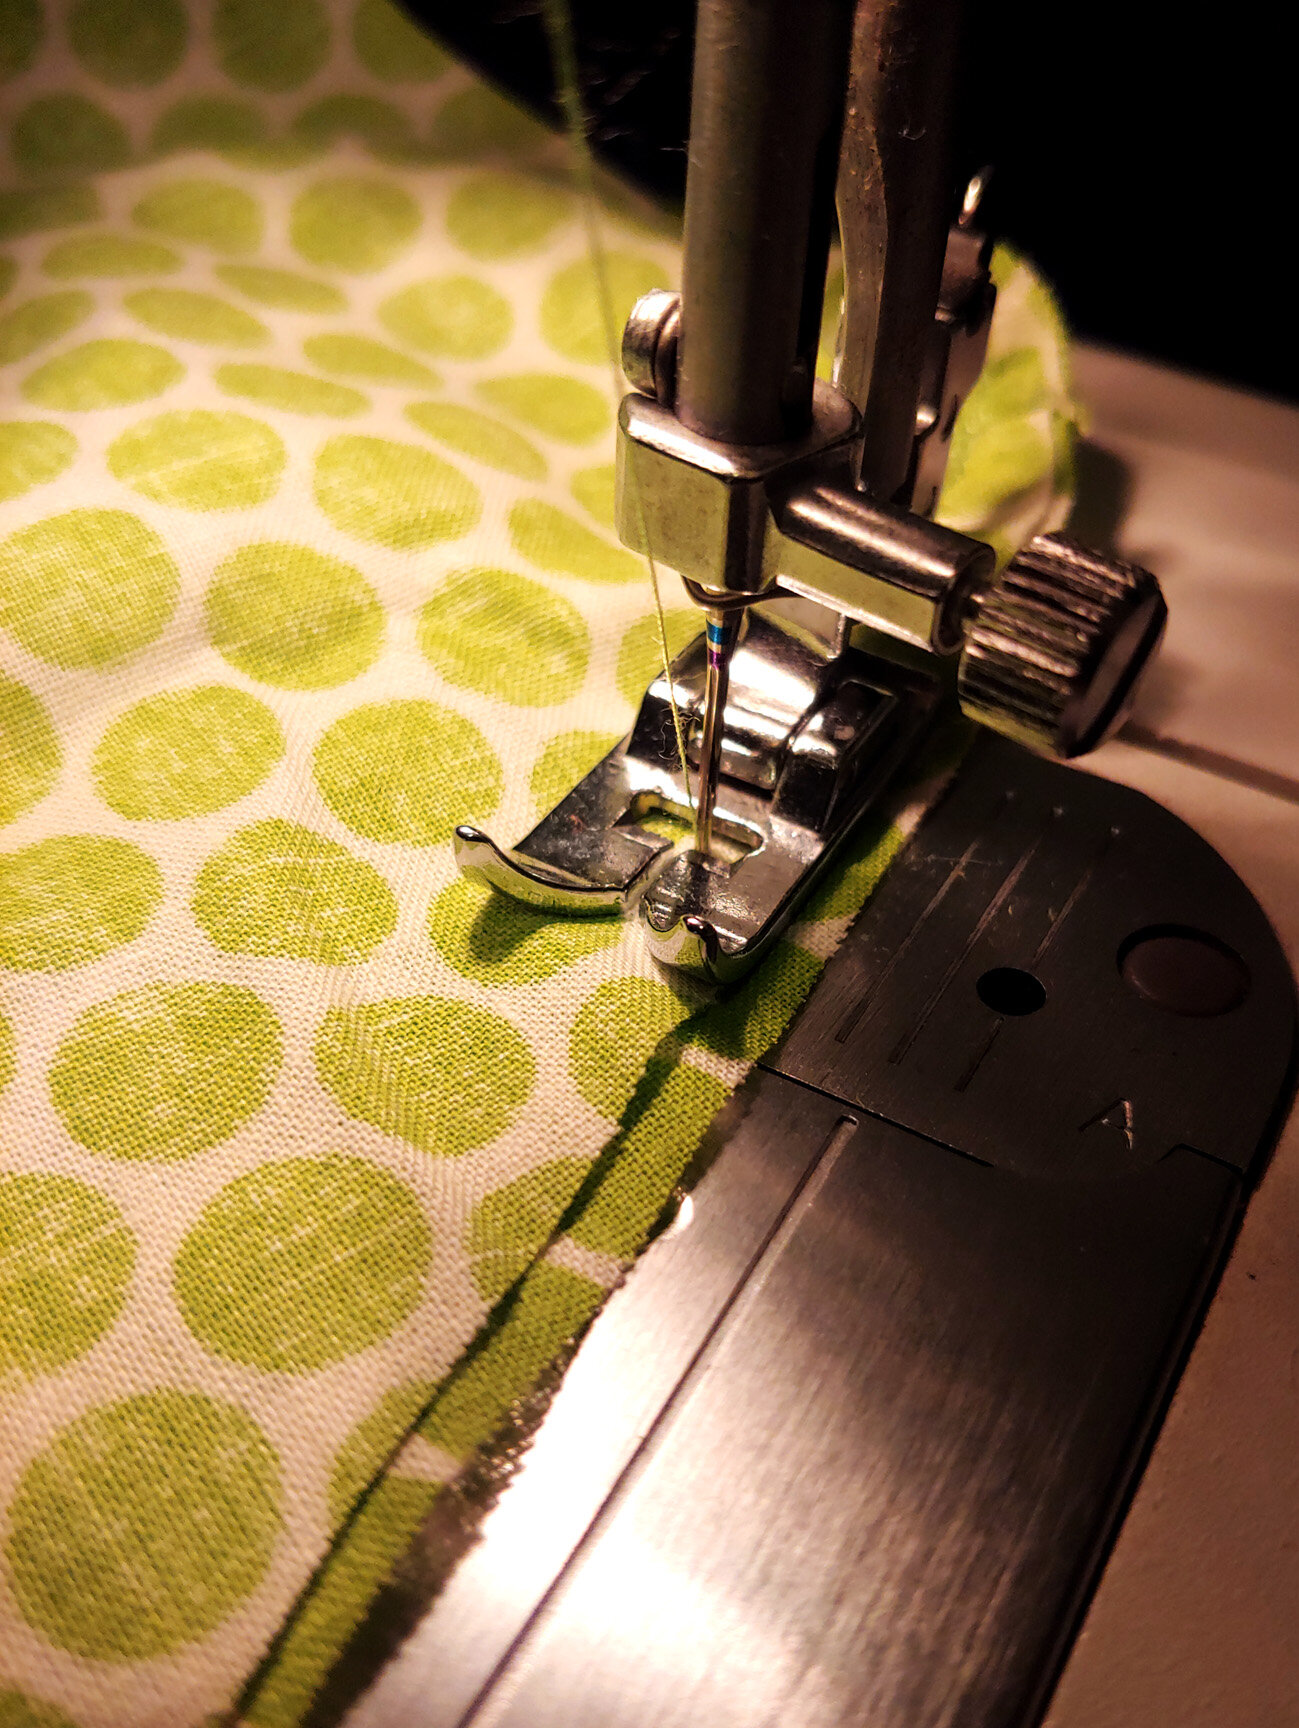
Since the hanbok is such a gorgeous garment, I wanted to pay respect to it by sewing it to look as beautiful as possible, with clean stitching and straight hems.
If I were making a hanbok to wear outside, I might have put a lining in the jeogori, but since I didn’t want to overheat, I opted to do French seams throughout the entire garment. With this technique all the raw edges are hidden, which not only looks a lot better, but also prevents the fabric from fraying along the seam lines. This doubles the work— since you basically sew every seam twice —but it’s worth the payoff. I also rolled the hems twice to reduce the chance of them coming undone.
For the chima, I gathered and basted the pleats in place, then attached it to the extra wide bias ribbon which I used for the waistband. I hand-sewed ties to the waistband so the stitching would only be visible on the inside.
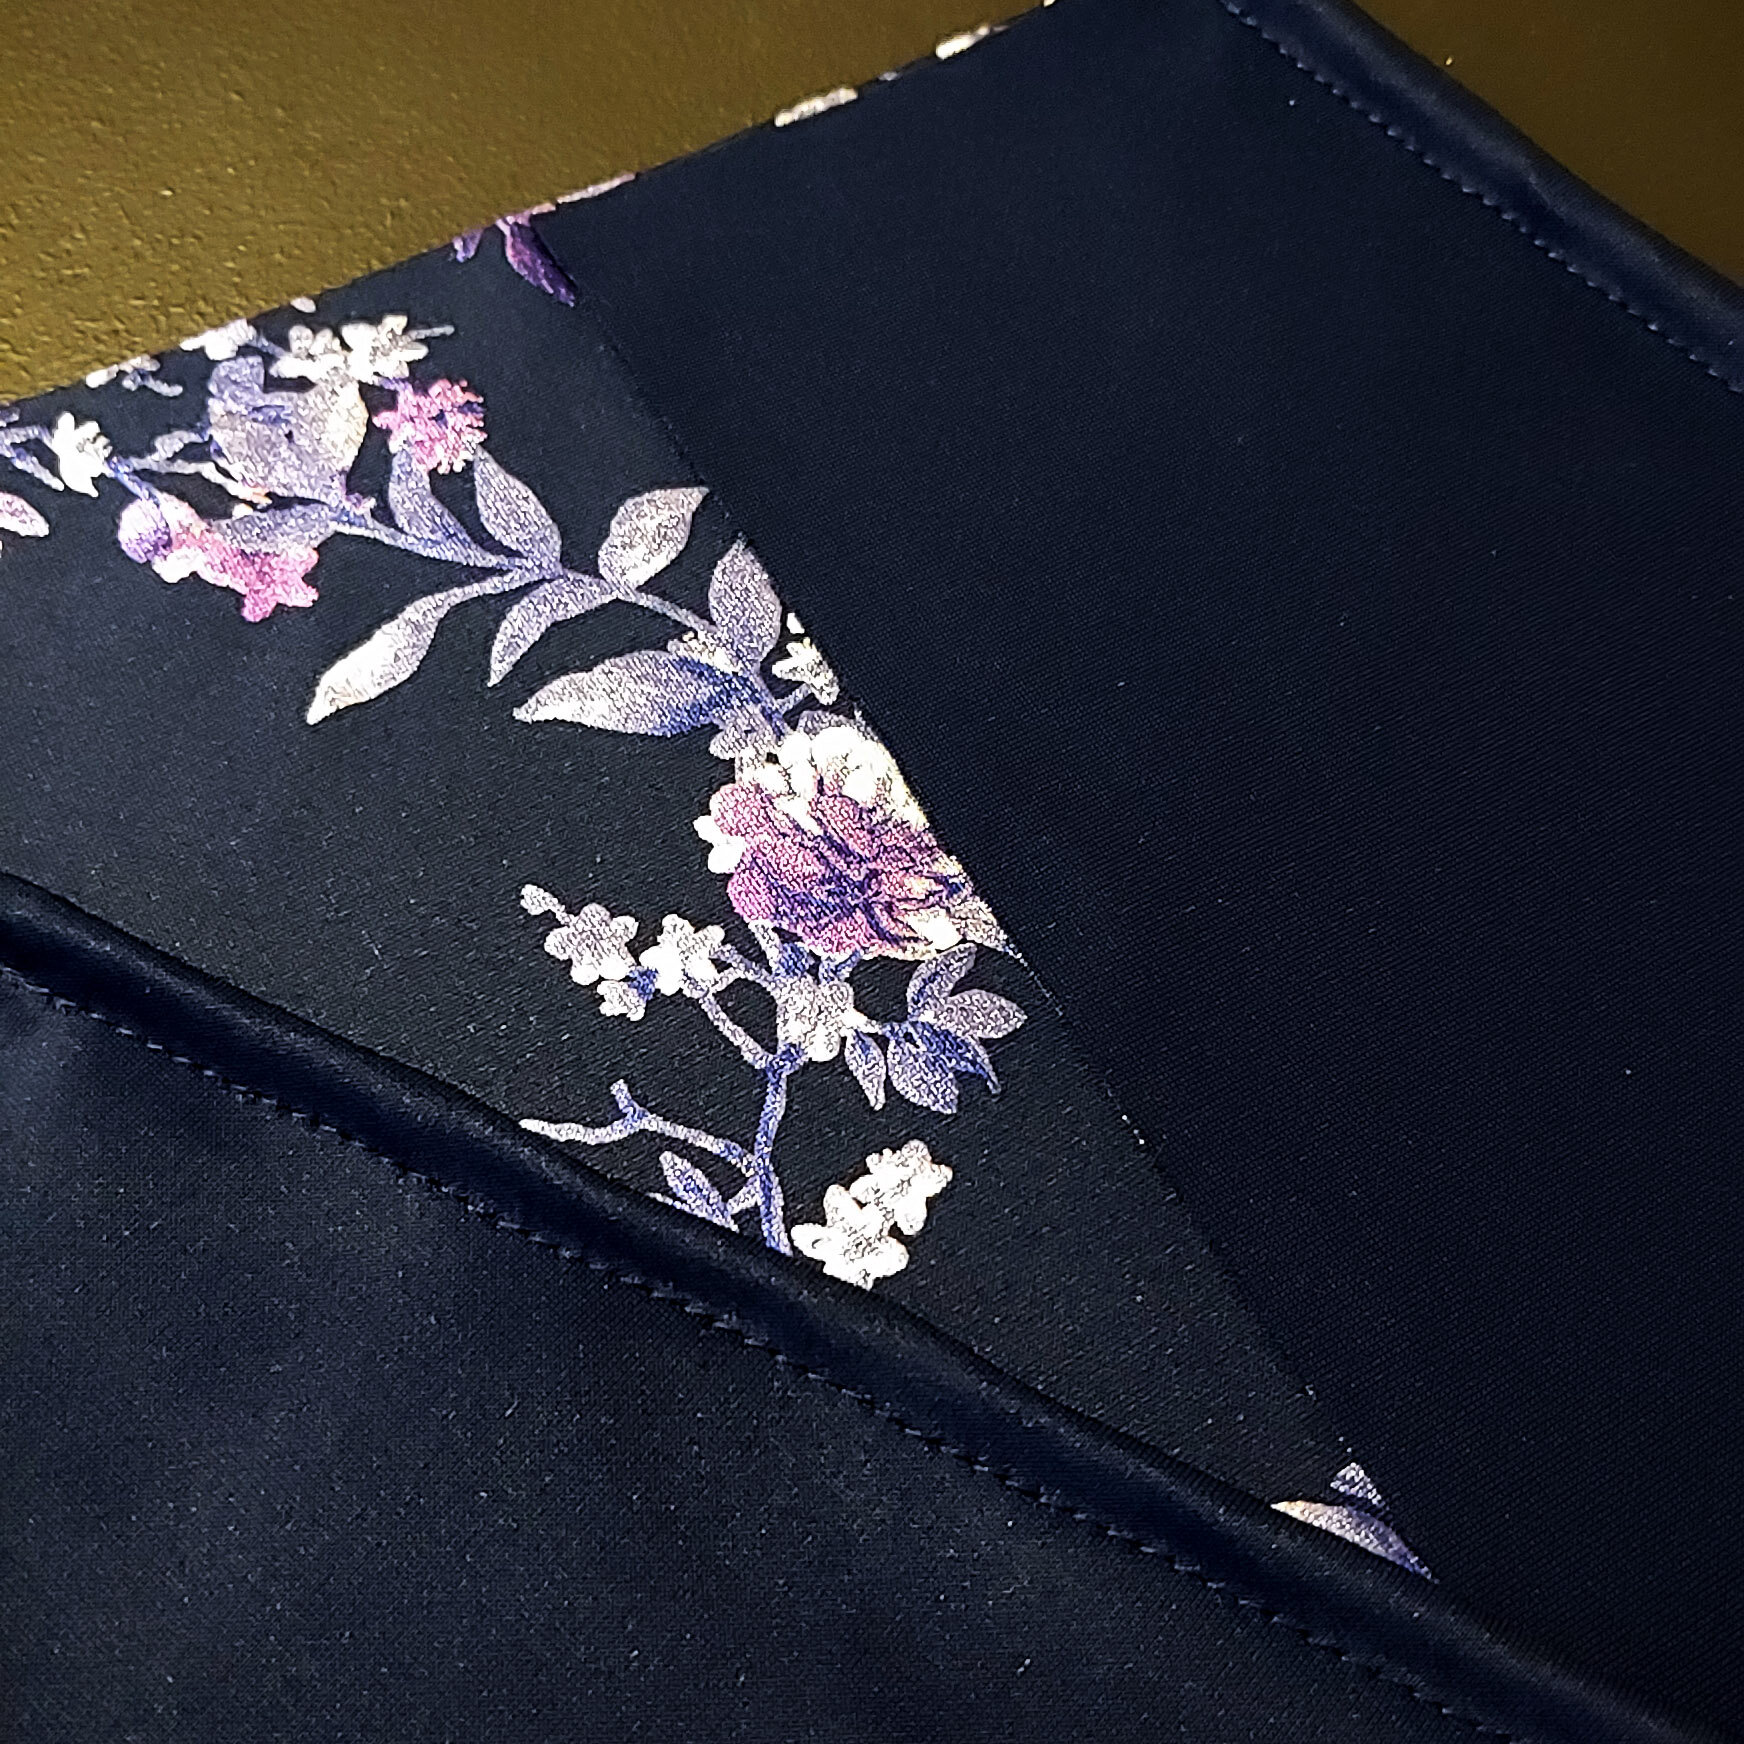
I used the same ribbon for the git, ggeutdong, and goreum. Throughout my research I noticed these pieces don’t all necessarily have to be the same color; in fact, it’s a very striking look for a hanbok to have multiple complimentary colors instead of completely matching. In this case, I was working on a tight budget, so that made the decision of how much fabric to buy for me.
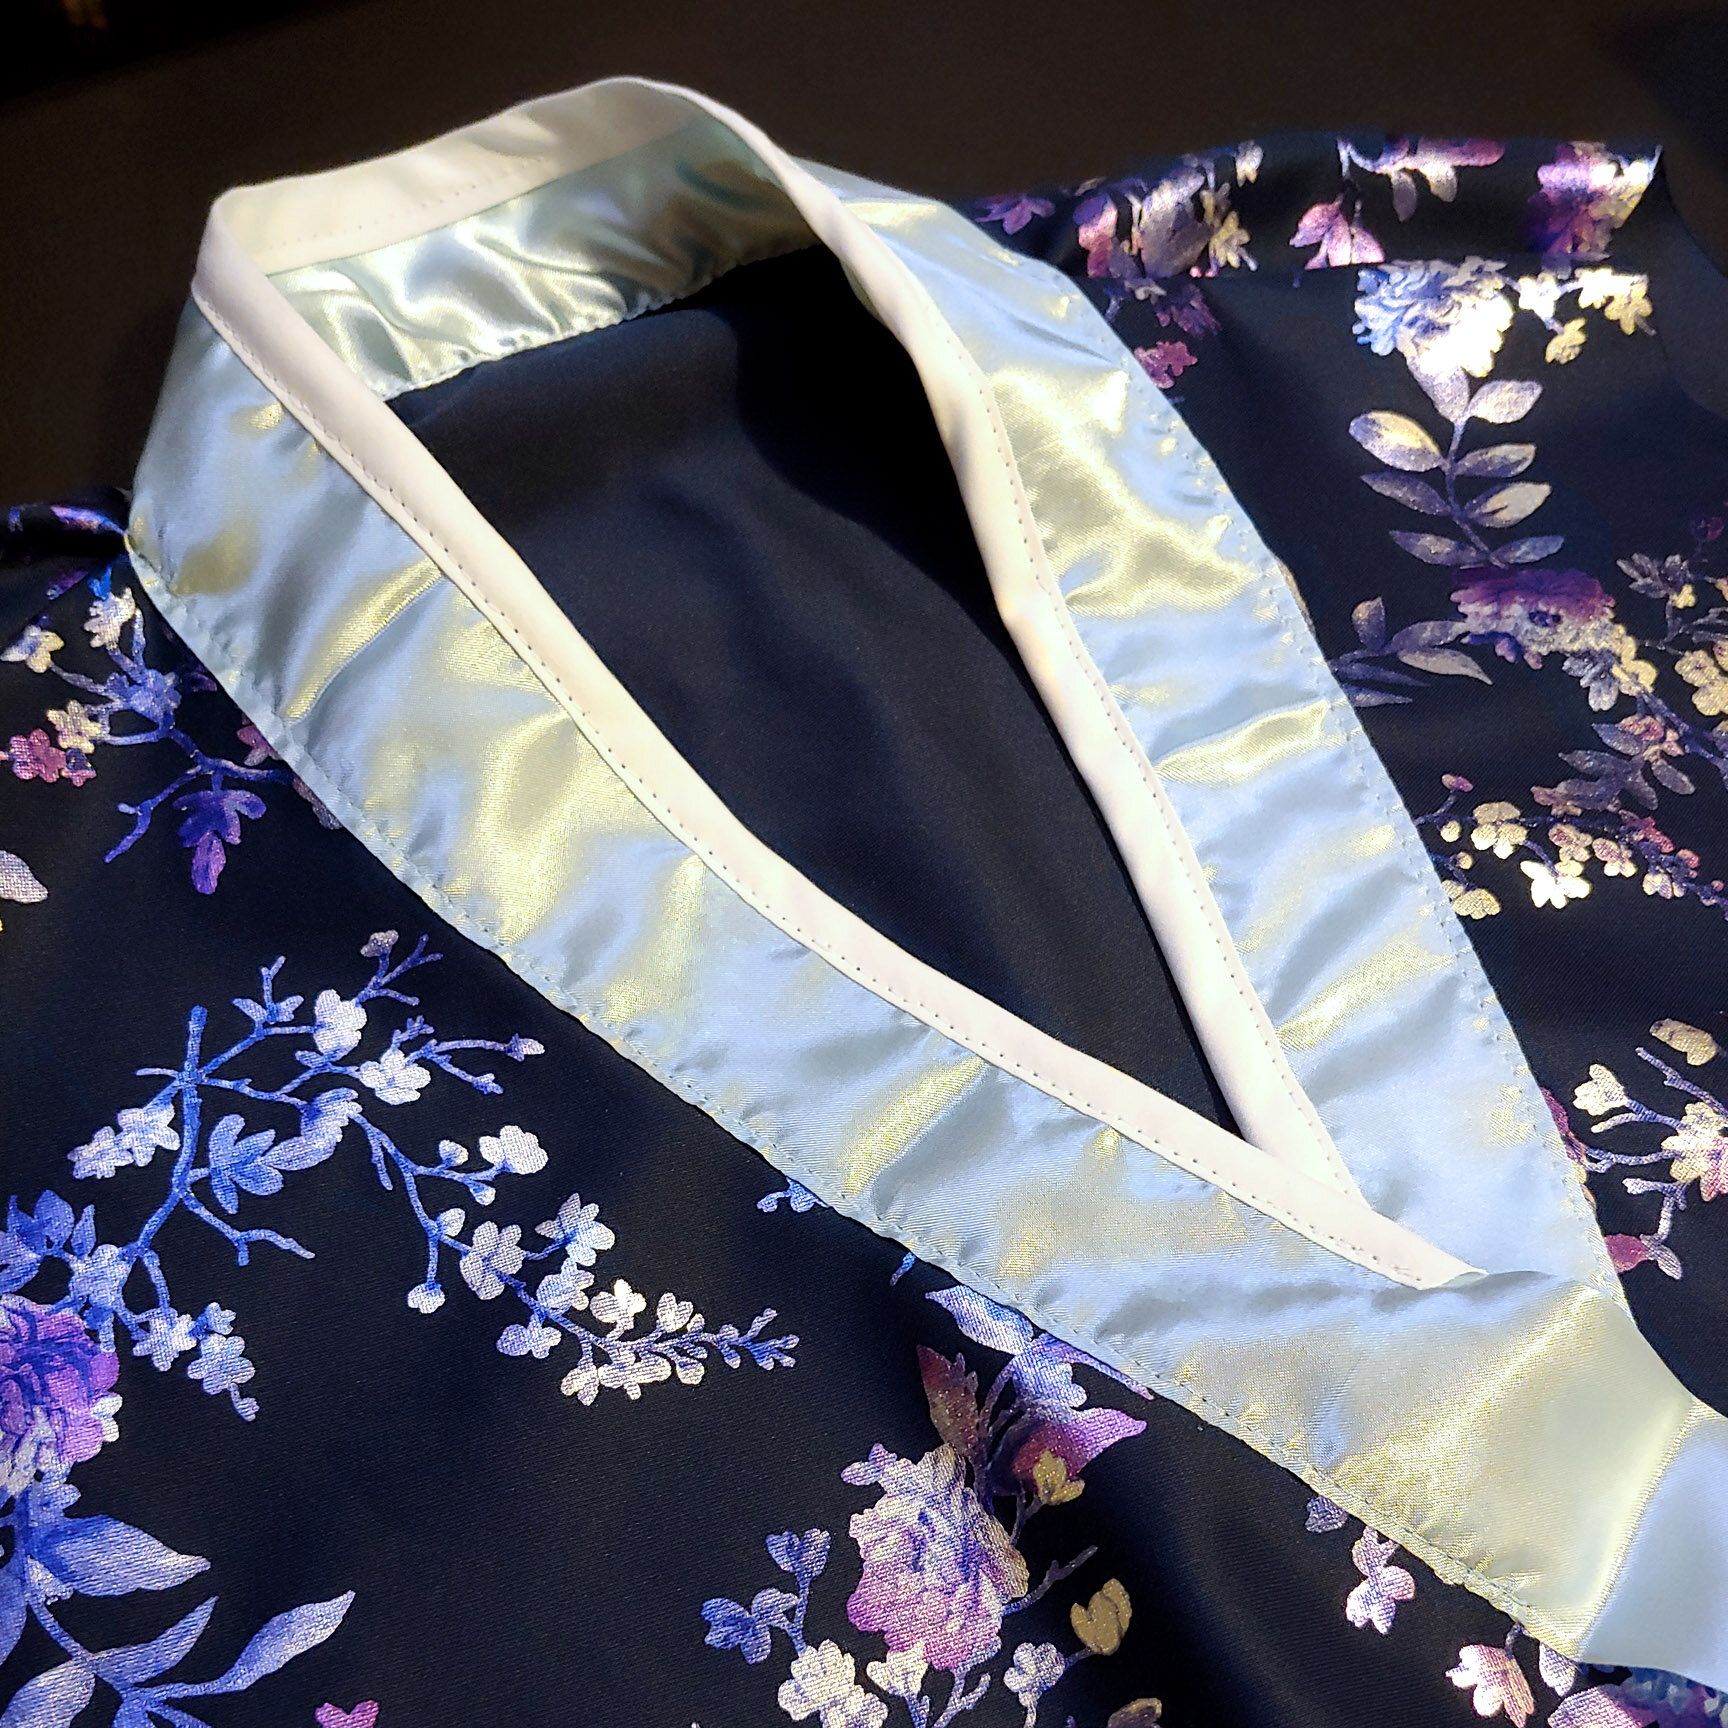
The dongjeong is thinner on my hanbok than the photos that turned up in my reading. Admittedly, I sacrificed the accuracy of this component to get a cleaner look by using purchased double-fold bias tape instead of trying to make my own.
In order to achieve the fullness of the chima you need to wear a hoop skirt. I used one I already owned, though I took the bottom two hoops out to make sure the chima fell in the correct shape (it was stretched too wide and the pleating didn’t look right). If your hoop skirt moves a lot (like mine), I would recommend wearing something underneath so it doesn’t slip down.
All put together, this hanbok made me feel like a pretty Korean princess!
IN CONCLUSION
Making this hanbok was a very special experience for me. It was my first sewing project of 2020 (after taking 2019 off from costuming), so that definitely added to the satisfaction, but honestly, it was more about how this experience allowed me to take my love for a unique and fascinating culture and turn it into something concrete.
Going forward, I will continue to seek opportunities that will allow me to appreciate and respect the beautiful country and culture of Korea. And speaking of which…
There’s another blog post coming soon, because I made this hanbok for a special occasion! Stay tuned for My Seollal (설날) 2020 — Celebrating the Lunar New Year!